Complete User Guide
This guide will walk you through the entire process of using our platform, from registration to managing security vulnerabilities.
1. User Registration
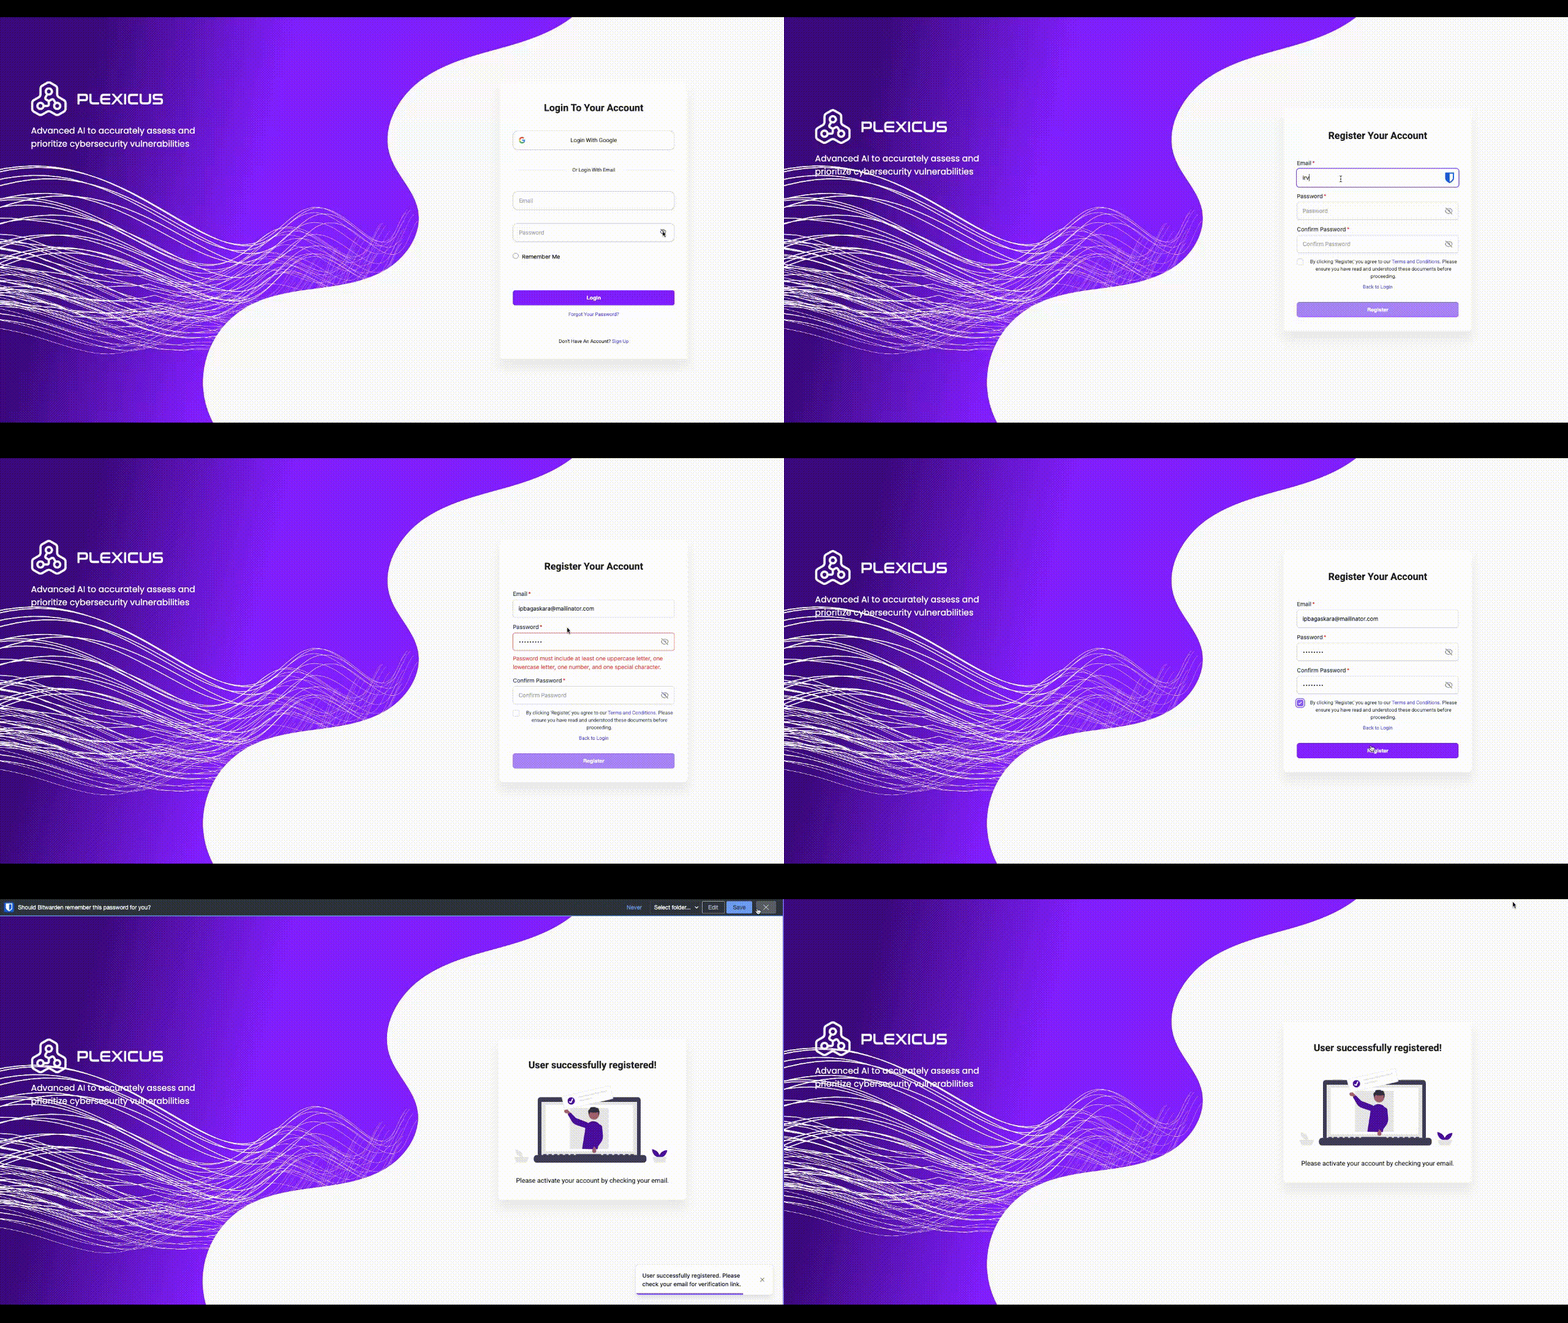
There are two ways to register for an account:
Form Registration
- Navigate to the registration page.
- Fill out the required fields:
- Email Address
- Password
- Click the "Register" button.
- After successful registration, check your email for a verification link.
Google Account Registration
- Click on the "Login with Google" button.
- Select your Google account or enter your Google credentials.
- Grant the necessary permissions.
- Your account will be created using your Google information.
If you register using Google, you won't need to verify your email as it's already verified by Google.
2. Email Verification
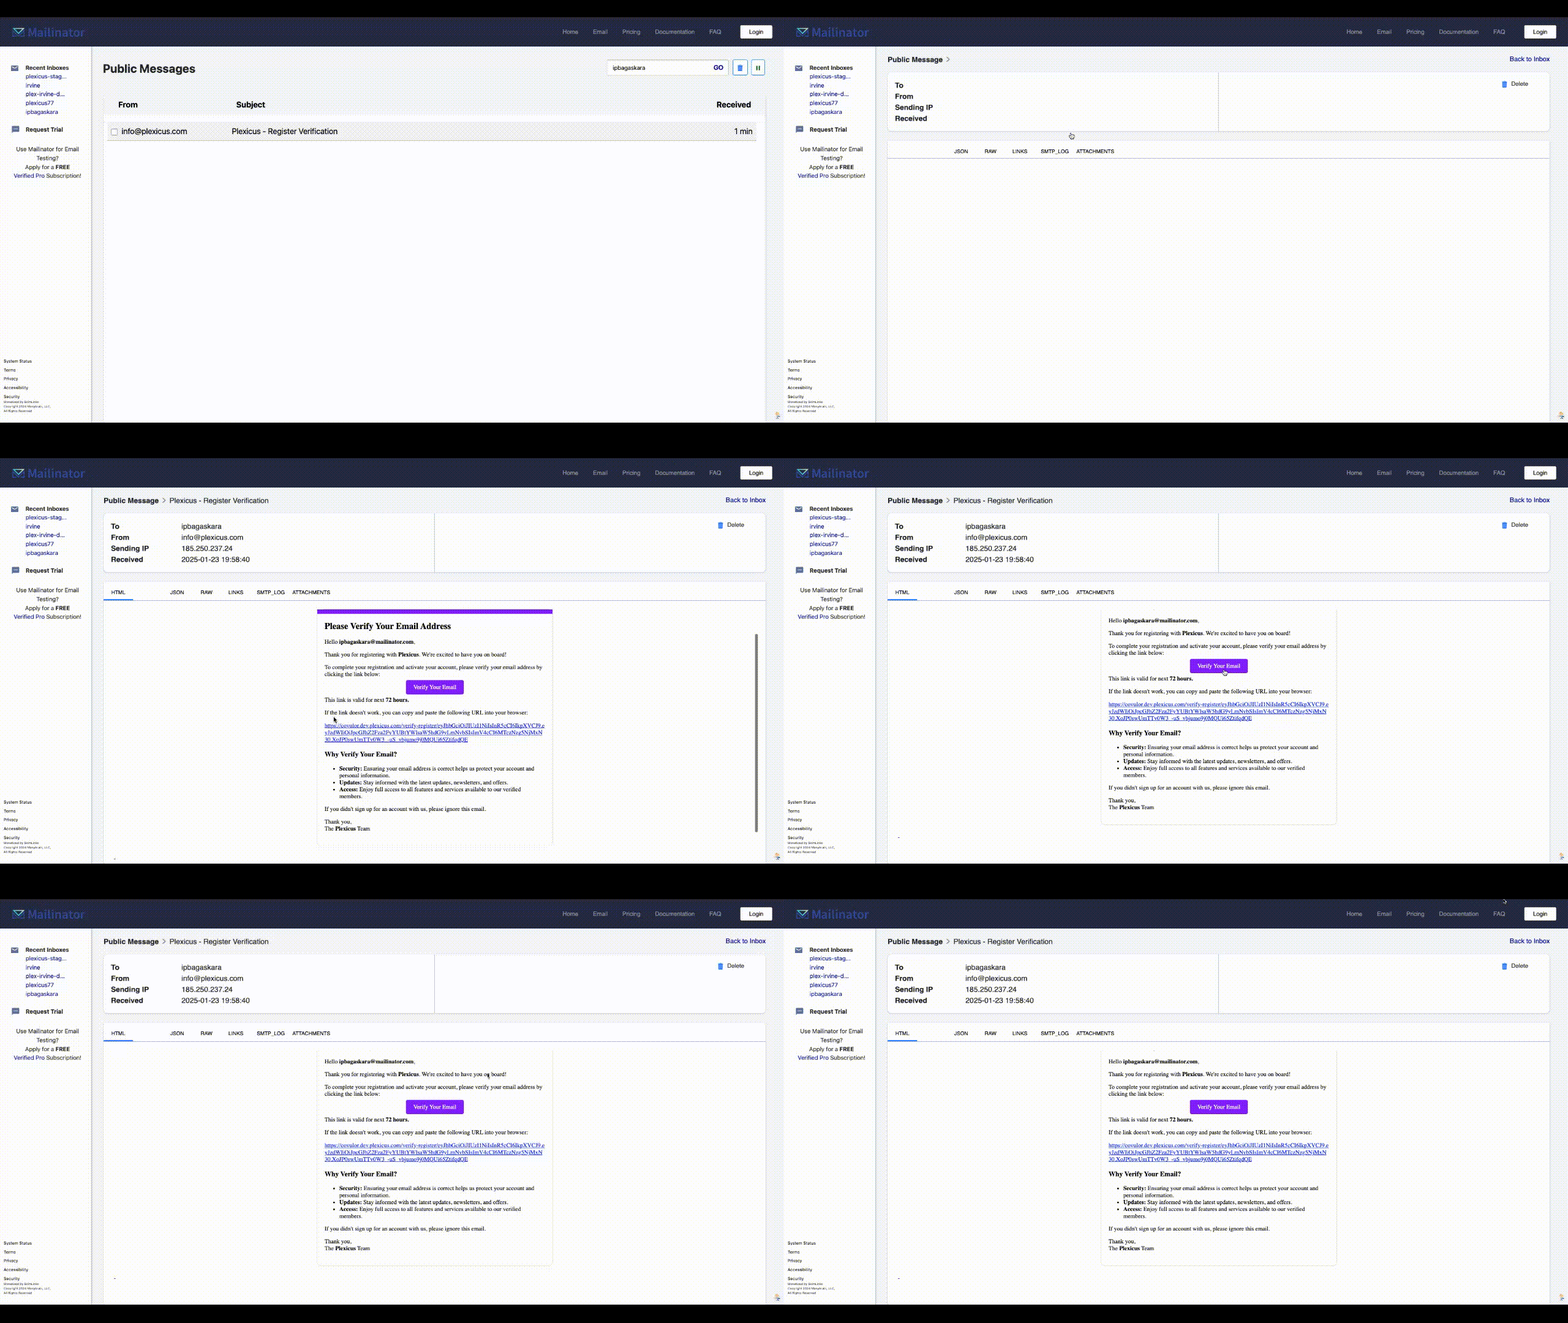
After registering with the form method, you need to verify your email address.
Verification Process
- Check your email inbox for a message from us.
- Open the email and click on the verification link.
- You will be redirected to a confirmation page.
- Click "Continue" to proceed to the login page.
The verification link is valid for 72 hours. If it expires, you can request a new one from the login page.
3. Initial Account Setup
After logging in for the first time, you'll need to complete the initial setup process.
Company Information
Enter your company details:
- Company Name
- Industry
- Other optional inputs
Organization Location
Provide your organization's primary location.
You can add subsidiary locations later in the settings.
Comprehensive Regulation
Select or create a comprehensive regulation for your organization:
- Choose from predefined options (e.g., ISO 27001, GDPR, HIPAA)
- Or create a custom regulation tailored to your needs
The comprehensive regulation helps in assessing and managing your security posture.
4. Connect Your Repository (SCM)
Plexicus integrates with multiple Source Code Management (SCM) systems. Choose the platform your team uses.
Step 1: Choose Your SCM
Navigate to Connectors and click Add Connector. Select your platform:
| Platform | Supported | Notes |
|---|---|---|
| GitHub | ✅ Yes | github.com and GitHub Enterprise Server |
| GitLab | ✅ Yes | GitLab.com and self-managed GitLab |
| Bitbucket Cloud | ✅ Yes | Bitbucket Cloud only |
| Bitbucket Server / Data Center | ❌ No | Self-managed Bitbucket is not supported |
| Gitea | ✅ Yes | Self-hosted Gitea instances |
| Forgejo | ✅ Yes | Self-hosted Forgejo instances |
| Azure DevOps | ✅ Yes | Azure DevOps Cloud and on-premises; includes TFVC support |
You can connect multiple SCM systems. Plexicus will scan repositories across all connected platforms.
Step 2: Authenticate
GitHub, GitLab and Bitbucket Cloud use a browser OAuth redirect:
- Click "Connect with [Platform]"
- Log in to your SCM account (if not already logged in)
- Approve Plexicus access to your repositories
- The connector will appear in your list with status Connected
Gitea, Forgejo and Azure DevOps instead ask for a personal access token and an instance URL directly in the connector form — there is no redirect.
Platform-Specific Guidance
See the SCM-specific guides for authentication details:
- GitHub — GitHub App (recommended) or OAuth App; GHES also accepts a PAT
- GitLab — OAuth application; self-managed instances register their own
- Bitbucket Cloud — OAuth consumer
- Gitea — Personal access token
- Forgejo — Personal access token
- Azure DevOps — Personal access token; also covers TFVC
Self-hosting Plexicus? The exact callback URLs, scopes and environment variables for every provider are in the SCM Connection Reference.
- Azure DevOps — Personal Access Token (PAT); also supports TFVC
Each SCM requires different authentication methods and token scopes. Check the platform-specific guide for details.
4.5. Quick Start: Try Sandbox (No Repository Required)
Want to see Plexicus in action without connecting your repository? Use the Sandbox:
- Navigate to Sandbox from the main menu
- Select a sample repository (pre-configured with vulnerabilities)
- Click Scan
- Watch the scan complete in ~2 minutes
- Review sample findings to understand the product
The sandbox is useful for:
- Evaluating Plexicus without connecting your code
- Seeing how findings are displayed and triaged
- Testing remediation workflows on harmless sample code
Once satisfied, return to Step 4 to connect your actual repository.
5. Applications
The Applications page allows you to manage your repositories and create applications for security scanning.
Creating an Application
- Go to the Applications page.
- Click on "Add Applications".
- Select the SCM connector you want to use.
- Choose the repository you want to add as an application.
- Configure the application settings:
- Application name
- Branch to scan
- Click "Create selected repositories" to finalize the application setup.
You can create multiple applications from a different repositories if you need to scan different repositories separately.
6. Select Scanning Tools
When creating or configuring an application, you'll select which security tools to run.
Plexicus includes multiple scanning tools organized into bundles:
| Bundle | Detects |
|---|---|
| plexicus-sast | Application source code vulnerabilities (XSS, SQL injection, insecure crypto) |
| plexicus-sca | Dependency vulnerabilities (outdated libraries, known CVEs) |
| plexicus-container | Container image scanning (base OS vulnerabilities, insecure configs) |
| plexicus-iac | Infrastructure-as-Code security (Terraform, CloudFormation, Kubernetes) |
| plexicus-secrets | Hardcoded API keys, credentials, tokens |
See Scanner Tools Catalog for detailed tool information, supported languages, and parameter configuration.
Default Configuration
Your subscription tier determines which tools are available:
- Starter: SAST + SCA
- Scale: SAST + SCA + Container + Secrets + IaC
- Enterprise: All tools + custom parameters
6.5. Pipeline Setup (GitHub Only)
GitHub users can configure automated scanning via webhook:
- Navigate to Pipeline Setup
- Select your application
- Configure trigger events: Push, Pull Request, Scheduled
- Save
Plexicus will run scans automatically on these events.
Pipeline automation is currently GitHub-only. Other SCM users can manually trigger scans.
7. Findings
The Findings page displays all the vulnerabilities and issues detected by your security scans.
Filtering Findings
You can use various filters to focus on specific types of findings:
- Click on the "Filter" button.
- Apply filters based on:
- Severity (Critical, High, Medium, Low)
- Type of vulnerability
- Repositories
- Date range
- Status
- Click "Apply Filter" to update the findings list.
Reviewing a Finding
- Click on a finding to view its details.
- Review the description, affected code, and potential impact.
- Assign the finding to a team member if needed.
8. Remediation
The remediation process helps you address and fix the security vulnerabilities found in your applications.
Creating a Remediation
- From the Findings page, select a vulnerability you want to address.
- Click on "Create Remediation".
- It will show the remediation type:
- Pull Request
- Issue
- If choosing a manual fix:
- Describe the proposed changes
- Assign the task to a team member
- Set a due date
- Click "Create Pull Request" / "Create Issue" to initiate the remediation process.
The pull request will be created in your SCM system (e.g., GitHub, GitLab) for review and merging.
Conclusion
By following this guide, you've learned how to:
- Register and verify your account
- Set up your organization's profile
- Connect your SCM systems
- Create and manage applications
- Configure security scanning pipelines
- Review and filter security findings
- Create and manage remediations
Remember to regularly review your findings and create remediations to maintain a strong security posture. If you need any further assistance, don't hesitate to contact our support team.